Manual based on CamerAlert for iOS v.1.4.1.
Last updated 10th Oct 2019.
NEW for 2025: Download our Quick Start Guide as a PDF!
CamerAlert – Quick Start (iPhone) – Last updated 2nd Jan 2025
1. What Is CamerAlert?!
2. Compatibility
A mobile data connection (GPRS, EDGE, 3G, HSDPA, 4G/LTE) is recommended but not required. If your device has no mobile data connection, your tariff does not include one or you are roaming in a foreign country then you can still use CamerAlert for your speed camera warnings but you will not be able to view the map while driving.
3. Registration, Subscriptions and Linking Accounts
Registration
No registration is required to use CamerAlert on your iOS device.
Subscriptions
If you wish to keep your database up to date then you will need a subscription. If you have an existing PocketGPSWorld.com membership then you can use this or, if not, you can subscribe from within CamerAlert itself. It is important to download the latest speed camera information to remain safe.
To link your existing account to CamerAlert (and use any associated subscription you may have) you need to:
- Press the settings cog button at the bottom right of the screen
 This brings you to the settings menu
- Tap on ‘Manage cameras’ at the top of the screen
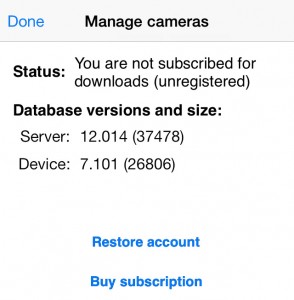
- Select ‘Restore account’
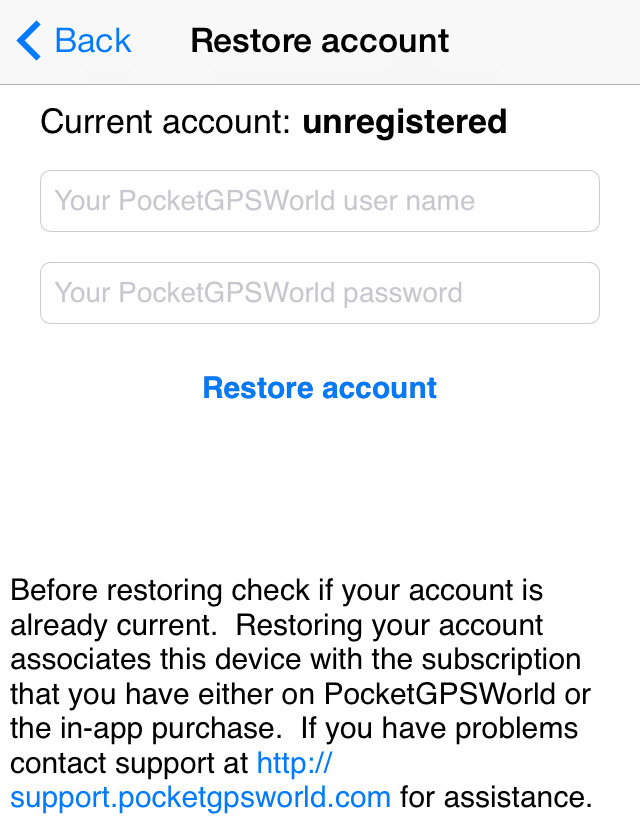
- Enter your username and password and tap ‘Restore account’
- Once confirmed your device will be linked and you can use any subscription you already have.
If you do not already have a subscription then you can either subscribe within the app or on the PocketGPSWorld.com website. The benefits of subscribing via the website are
- Use your subscription on other devices (such as on your TomTom or Garmin satnav)
- Subscriber-only competitions and offers
- Automatic subscription renewals (optional)
To subscribe via the website click here: Subscribe at PocketGPSWorld.com
To subscribe in the app:
- Press the settings cog button at the bottom right of the screen and then
This brings you to the settings menu
- Tap on ‘Manage cameras’ at the top of the screen
- Select ‘Buy subscription’
- Wait for the available subscription offers to load from Apple’s servers
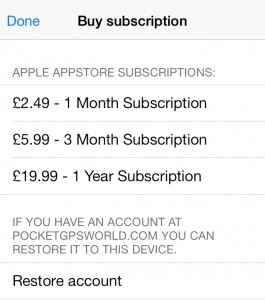
- NOTE: Prices may differ depending on Apple’s current In-App Purchase pricing policies and your country of origin.
- Tap your desired subscription length
- Confirm the price and enter your Apple AppStore account details
- The subscription length will be added to any existing subscription period you have remaining
4. Updating the Database
In order to update the database you need a valid subscription (see section 3 above), a data connection and a spare minute of your precious time.
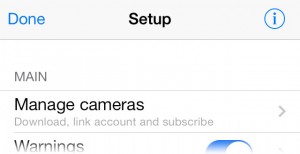
To update you need to tap the settings cog button at the bottom right of the screen and then tap on ‘Manage cameras’ at the top of the screen.
On this screen you will be shown a confirmation of your PocketGPSWorld.com username and your subscription details. Simply tap the button that says ‘Download database’.

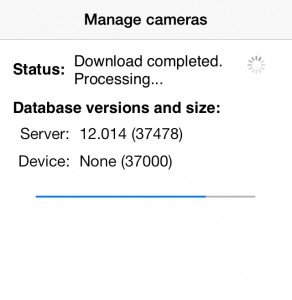
Leave this a moment to update and once it’s finished you can tap ‘Done’ to leave the update screen.
* There may be a small handful of days in the year where the database update schedule is changed for example over Christmas or due to holidays. These will be announced in advance on the website.
5. Driving and Getting Your Camera Alerts
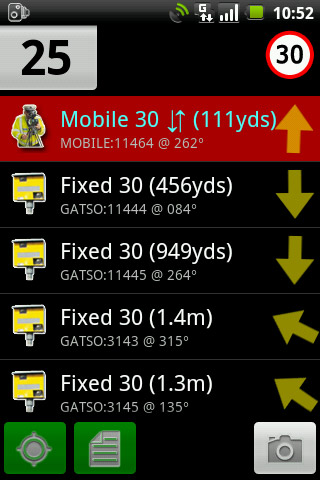
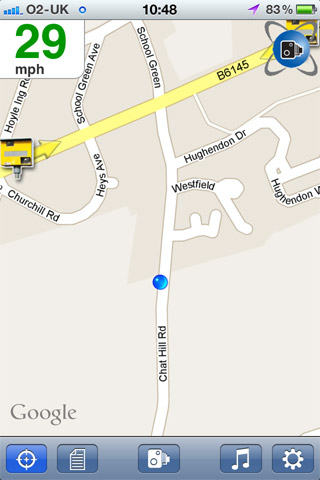
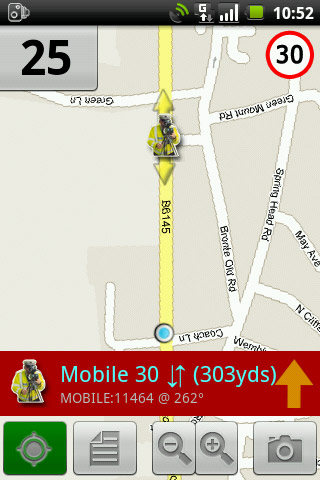
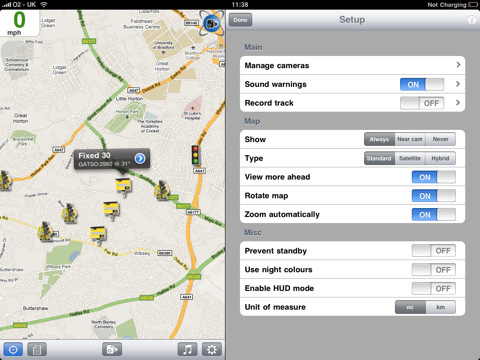
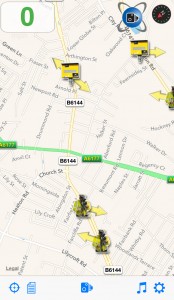
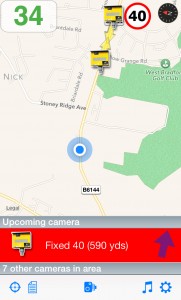
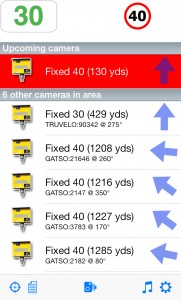
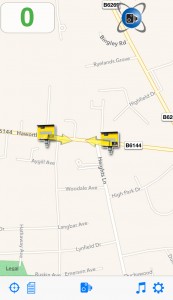
The main view of CamerAlert is the driving screen; by default this is predominantly a map of your location although you can change this to a list to reduce data usage (see Section 6a ‘Select your view’). The picture below shows the layout of the screen in both ‘map view’ and ‘list view’.
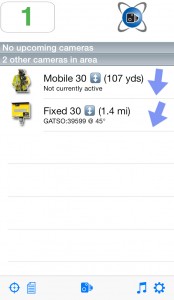
Tapping the list icon ![]() switches between views; or you can set it permanently in the settings (see Section 6).
switches between views; or you can set it permanently in the settings (see Section 6).
In order to be alerted of upcoming camera sites you must have location tracking turned on using this button at the bottom left of the screen: ![]() . When you first run CamerAlert you may be prompted to allow the app access to your location; you MUST grant this permission or the app will not function correctly. Once CamerAlert has a valid GPS fix (you may need to get off your couch and go outside) the logo in the top right will change from red
. When you first run CamerAlert you may be prompted to allow the app access to your location; you MUST grant this permission or the app will not function correctly. Once CamerAlert has a valid GPS fix (you may need to get off your couch and go outside) the logo in the top right will change from red ![]() to blue
to blue![]() .
.
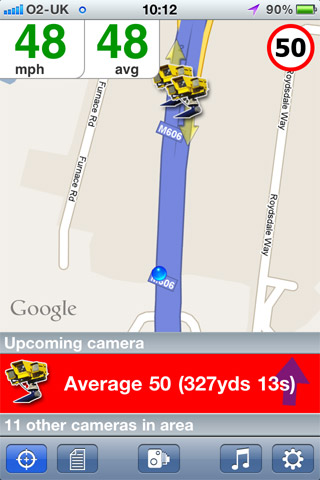
Once CamerAlert has your location the map display will be updated and you can go driving. As you approach a camera site an icon will be shown on the map (see Appendix 1 for full details) and you will receive an audible alert as well as a visual display of the camera’s details. Note that CamerAlert uses a directional database so you will only get warned of cameras affecting your direction of travel and not those on the other side of the road (although you will still see the icon). You can fine-tune your warning settings (time to warning, alert type, overspeed warnings etc) if required; details of how are in Section 6c ‘Alert settings’.
As you approach a camera the speed limit will display at the top right of the screen. If you are running CamerAlert in background mode then you will receive a local notification (see section 6) of the camera details.
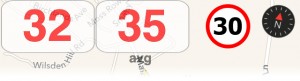
If you are over the speed limit then your current speed (top left) will turn red and, if you have the overspeed option selected, you will receive an alert to say you are going too fast.
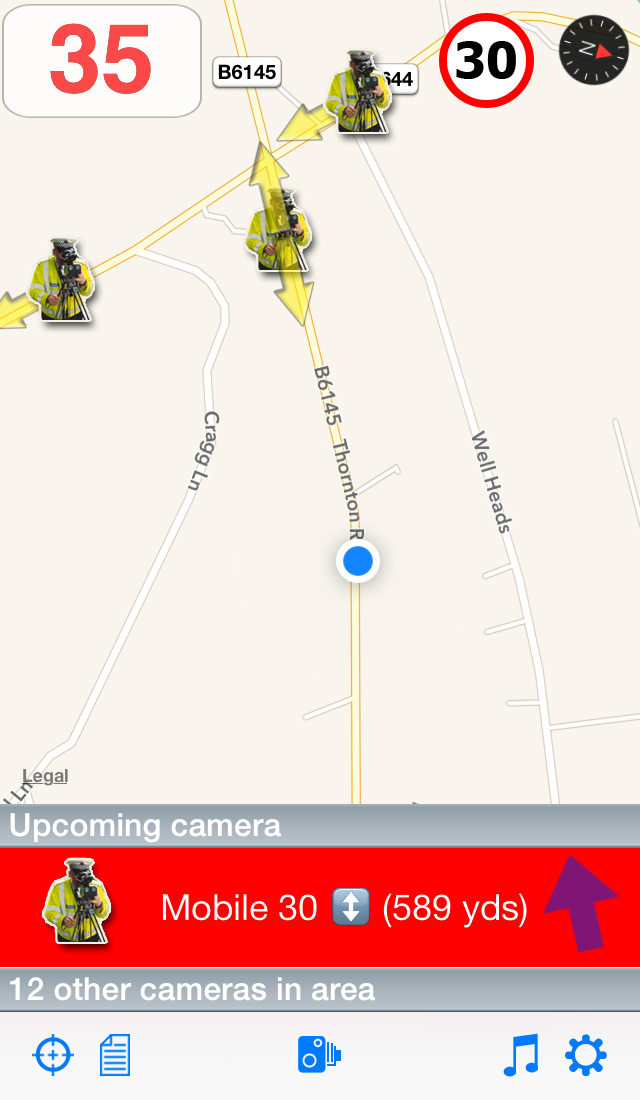
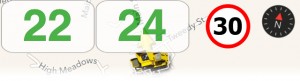
If you are in an average speed zone, for example SPECS through roadworks on a motorway, then your average speed between each camera will show next to your current speed. The average speed can be started or stopped manually by tapping your current speed. At the last camera of the average speed zone the average speed will automatically be stopped. It will also stop if you leave the average speed zone.
That’s it! It really is that simple – drive and get warnings. However, there are a few things you should be aware of…
There are also a few instances where you may get a false alert, which are described below:
- Parallel road: If the camera is on a road parallel to the road you are traveling on then you may get an alert even though you are not passing the camera directly. This could also happen on a winding road where a camera comes into your ‘alert cone’ but then as you turn it goes out again.
- Wrong direction: If a camera has no direction data then you will receive a warning regardless of which direction you are traveling in (see Section 7 ‘Reporting cameras’ on how to correct this). You will also get an alert if the camera is reversible – even though at the time you pass the camera it happens to be facing the other direction.
- Mobile camera is not there: Mobile cameras, by their very nature, will not always be in use so you will still receive a warning that it is a known location. See Section 7a ‘Active mobiles’ for how to report when a mobile site is or is not in use.
- Crossroads: Depending on the layout of the junction and the angle of the roads you may get warned of a camera not on your exact route.
6. Customising the Settings and Alerts
As with most apps you will want to customise how CamerAlert works for you. The following sections deal with the majority of settings you can customise and provide some explanation into their function.
To access the Settings simply tap the cog item at the bottom right of the main screen.
The full menu is shown below for reference:
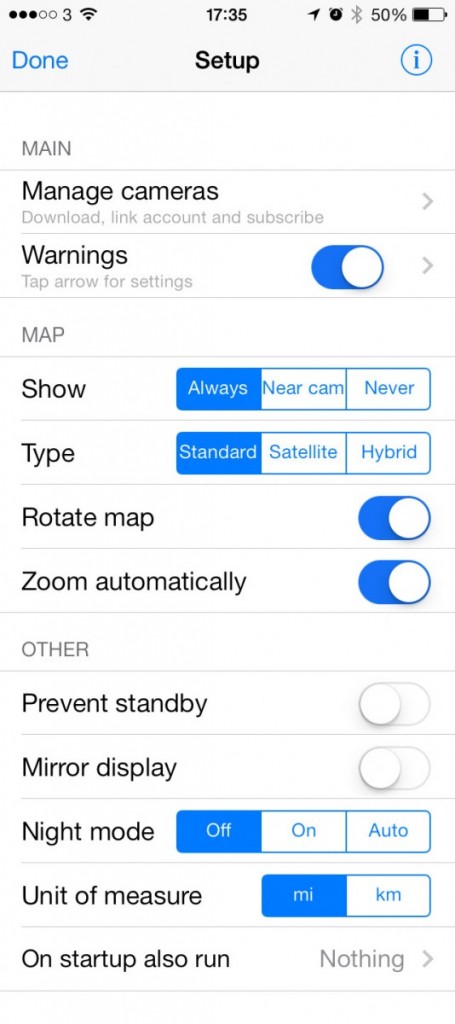
Show maps or not?
We offer three different view types for the main screen which you can change by scrolling down the settings page to the ‘Map’ ‘Always’, ‘Near cam’ and ‘Never’ – simply tap the option you want to use.
![]()
- Always: The map is always shown so long as you have an active data connection. The maps are downloaded from the Internet as they are required. If the map cannot be downloaded then a grid will be displayed instead. This will use the most data.
- Near cam: This will show the ‘List view’ until you approach a camera. At this point the map will be downloaded from the Internet and displayed. If you do not have a data connection then a grid will be displayed. This is a good compromise between seeing the maps but minimising data usage.
- Never: The maps are never displayed. This is useful if you are traveling in a foreign country and you do not have a roaming data plan. Note that if you select ‘Never’ then the rest of the map options will not be available to you.
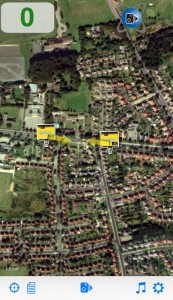
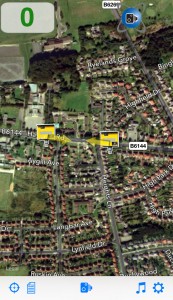
Map types
If you have one of the map views selected then you can also select the type of map to display. You can choose from: Standard, Satellite or Hybrid.
![]()
See below for samples of each.
Night mode
CamerAlert has a built-in night mode that will make the menu screens darker and also make the driving display darker. There are 3 options:
![]()
- Off: night mode is always off
- On: night mode is always on
- Auto: night mode will automatically turn on and off at dusk and dawn for your current location – this is the default selection.
Other map options

- Rotate map: When turned on this will automatically rotate the map tiles so you direction of travel is towards the top of you device. Turning this off will force the map to stay ‘North up’.
- Zoom automatically: When turned on the map view will zoom out at higher speeds so you can see more ahead – this also saves data as less map data are loaded. On approaching the camera the map will zoom in to see the location in more detail. When turned off you can manually pinch/pull to set your own zoom level.
- Unit of measure: Miles or Kilometres – simply set this to the unit used in the country you are driving in.
i) Display
In the Settings you can control settings related to your device’s display.
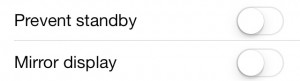
- Prevent standby: Turning this on will stop your device from automatically entering standby when there has been no interaction for a certain period of time.
- Mirror display: Turning this on will display a mirror-image of the main view so you can create a basic Heads-Up Display (HUD) by placing the device on the dashboard and using its reflection in the window.
ii) Audio Routing
Many users have BlueTooth (BT) audio or BT handsfree sets in their vehicles and CamerAlert can make use of these for playback of audio. The following notes assume that your device is connected to your BT hardware.
To change where the audio from CamerAlert is played you need to adjust the Audio route. In the settings menu tap on ‘Warnings’. You have three options which are , from left to right: default, device speaker and Bluetooth headset.
![]()
- Default: This will use the standard, current output of your device. This would usually be the device speaker but will change to the headphone output if you have that connected or an A2DP BT connection if that is set up.
- Device speaker: This forces the audio to use the device’s speaker and ignore any BT or headphone output.
- Bluetooth headset: This sends the signal to a Bluetooth headset; Note that this is NOT the same as the A2DP stereo Bluetooth connection. It is a (beta) fallback for older systems.
iii) External Bluetooth GPS
If your device does not have a GPS chip (or it is damaged) then you may be able to use Bluetooth GPS module if your device supports it. In general these will be integrated into the iOS Location Services allowing apps, such as CamerAlert, to function as normal. You will need to refer to the operating instructions for your Bluetooth GPS device and associated settings.
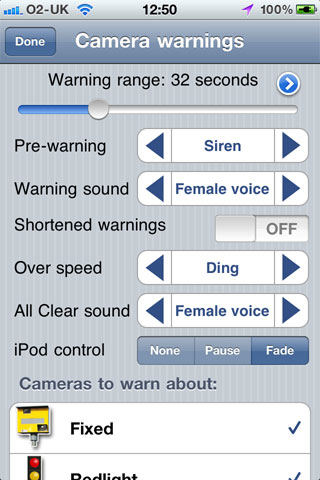
There are a number of options for customising how you are alerted to speed cameras and known mobile camera locations.
To turn the audible warnings on or off tap the blue slider-button next to ‘Warnings’ in the Settings menu.
![]()
To adjust the other alert settings tap on the word ‘Warnings’ – this takes you to the ‘Camera warnings’ screen where you have access to various settings. The menu is shown below and is followed by a description of each option.
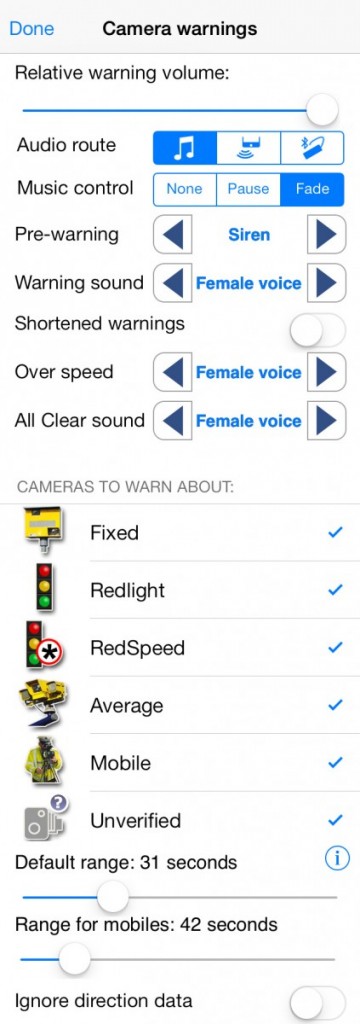
Relative warning volume
![]()
Adjust this slider to reduce the volume of the alerts. This could be used if, for example, the alerts are much louder than a podcast you are listening to while driving.
Audio route
See Section 6b (Hardware control).
Music control
Change how you want currently playing audio to be handled when CamerAlert gives you warnings:
![]()
- None: Do nothing; the alerts will be played alongside any existing audio
- Pause: Pause the currently playing audio, play the alert, then restart the other audio.
- Fade: Fade the currently playing audio slightly, play the alert over the top, then fade the volume back up. Note that some apps, such as Apple’s Podcast app, do not work with the ‘fade’ option and you will need to select ‘Pause’ instead.
Warning Sounds
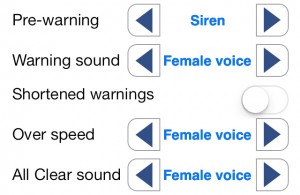
- Pre-warning: Select the sound to play before the main warning. Tap the selected text for a preview.
- Warning sound: Select the type of sound for the main alert. Tap the selected text for a preview.
- Shortened warnings: The standard male/female voice alerts will say “Fixed speed camera, 40 miles per hour”. If you turn on shortened warnings this will be reduced to “Fixed, 40”.
- Over speed: Select the sound to play if you are over the camera’s speed limit. Tap the selected text for a preview.
- All Clear sound: Select the sound to play once you have passed the last threat. Tap the selected text for a preview.
Cameras To Warn About
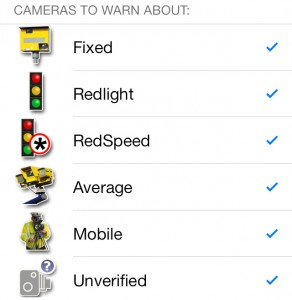
From the options, select which types of camera you wish to get audible alerts for. All icons will always be shown on the map regardless of settings.
Warning Range
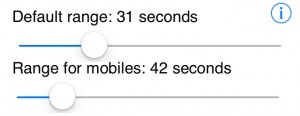 Default range: Adjust the slider to set how many seconds warning you want for the camera. The default is 40 seconds.
- Range for mobiles: Adjust the slider if you wish to have a longer warning for upcoming mobile sites.
Ignore direction data
![]()
Turn this on if you want to be alerted to all cameras regardless of which direction of travel they are targeting. The default is off.
There are some further settings to customise CamerAlert that most users will not need to use. To access the Advanced settings go to the CamerAlert settings and tap on ‘Warnings’ to bring up the ‘Camera warnings’ settings. From here, scroll to the bottom and tap the (i) next to the ‘Default range’ setting.
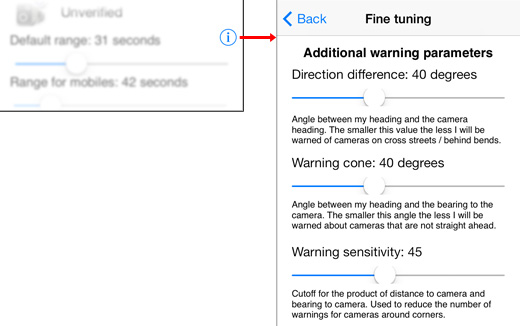
‘Direction difference’, ‘Warning cone’ and ‘Warning sensitivity’
Here you can fine tune the camera detection process. The defaults are in the middle of the sliders. If you find that your local camera alerts you when you are around the corner then you can lower these values a bit to adjust the sensitivity. Most people will not need to adjust these.
We’re not silly. We know you only use us for our database! So, because of this, we’ve made it even easier to start up another app when CamerAlert launches giving you your favourite navigation app with CamerAlert up and running in the background.
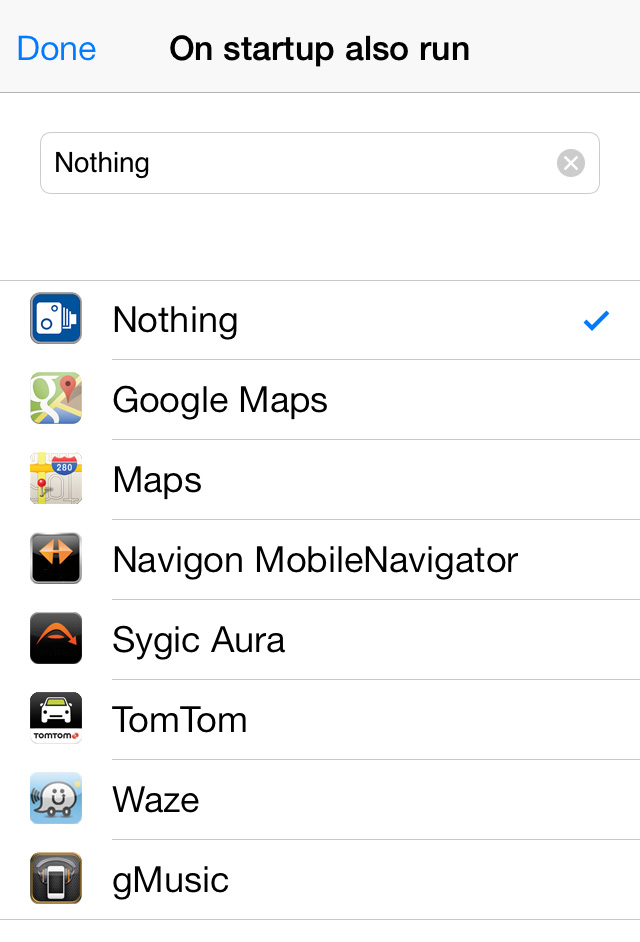
In the Settings menu scroll down and tap on ‘On startup also run’. You will be shown a list of compatible apps that you have got installed on your device. Simply tap the one that you want to load automatically when CamerAlert starts. You will need to fully close CamerAlert for this to have an effect.
If you know or discover any URL schemes for navigation apps that we do not already have then please let us know on the contact page. The easiest way to find them is to ask the developer if they have a custom URL scheme.
The second easiest way is to see if the app has a ‘share my destination’ feature – this will usually send an email and you can look for the url scheme there. You can ignore any text after the forward slashes. For example if a ‘share my destination’ link was: yourappsurlscheme://?lat=52.12345&lon=-1.23456&name=Home then the text to enter (and send to us) would be: yourappsurlscheme:// – this would be enough to launch the app when CamerAlert loads.
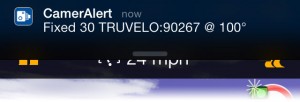
CamerAlert makes use of Apple’s notification system that was added in iOS6. By default, when CamerAlert is running in the background, you will get a banner that appears at the top of the screen to give you a visual warning:
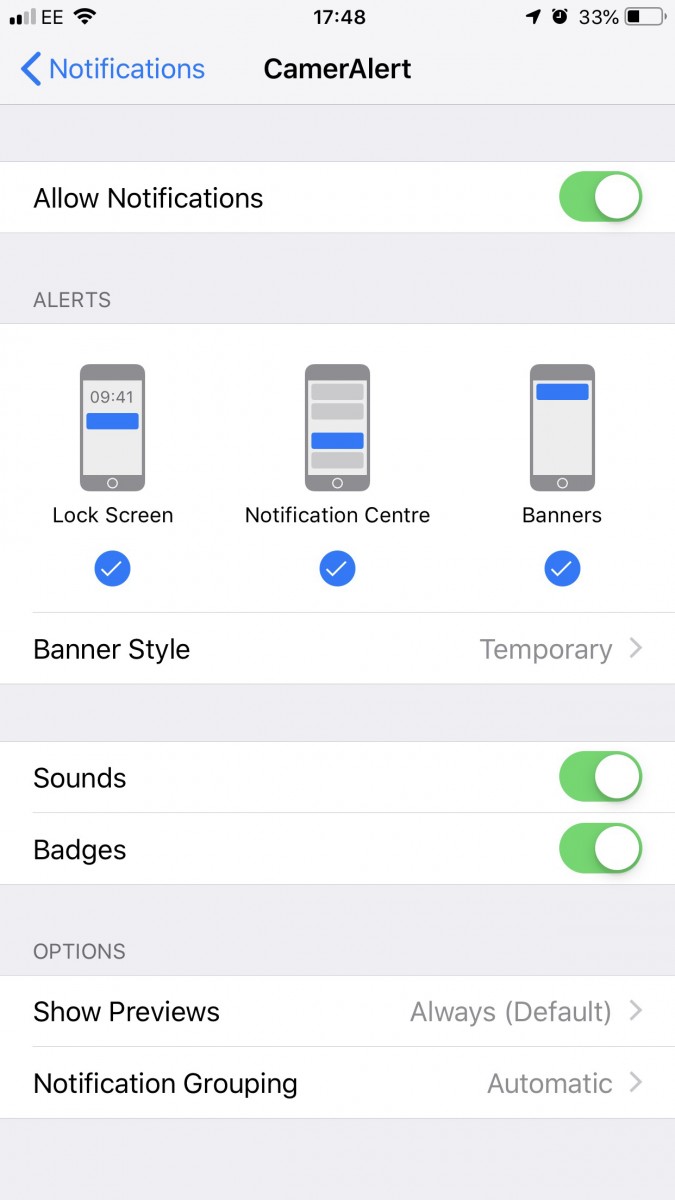
You can adjust settings related to notifications in your main iPhone settings in ‘Notification Centre’.
![]()
Scroll down and then find and tap on CamerAlert (the apps are not in any particular order) and you can choose how notifications are displayed on your iPhone.
7. Reporting Cameras
Mobile cameras (vans, police with handheld gun etc) are not always going to be in use when you pass a known site. As such you may receive ‘false’ warnings at these locations. We monitor how frequently mobile sites are used and remove any sites that have not been used for a long period of time.
When you pass a mobile site we ask you to report whether it is in use or not. As you approach a mobile site CamerAlert will issue a ‘ding’ sound and show up a tick and cross on the bottom of the screen.
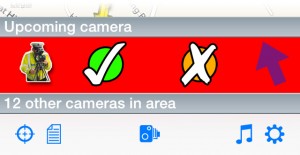
If the mobile site is in use then tap on the tick, if not then tap the cross.
Note that the cross simply tells us it is not in use at that time, it does not report it for removal.
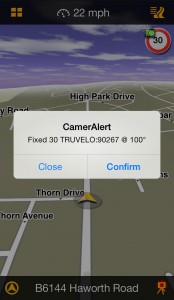
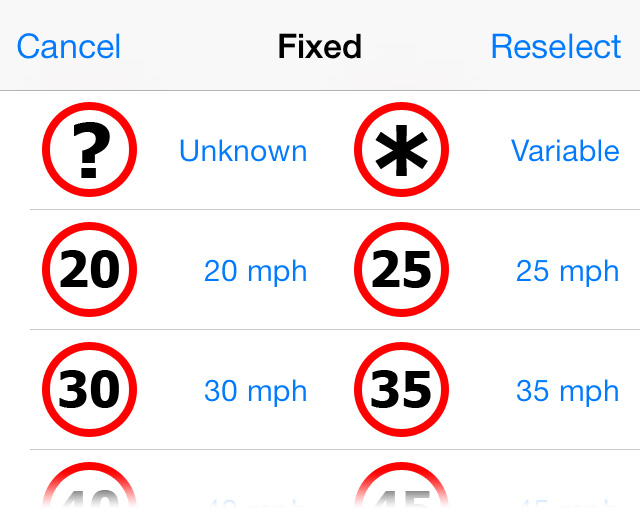
Should you need to submit a new fixed camera (such as temporary cameras in roadworks) or a new mobile site then you can do this from within CamerAlert by following these steps:
- Tap the ‘camera’ icon in the menu bar

- Check the map to make sure the location is correct (If you need to adjust the location tap on the arrow in the corner of the map thumbnail and reposition the pin, tap the arrow to accept and close.
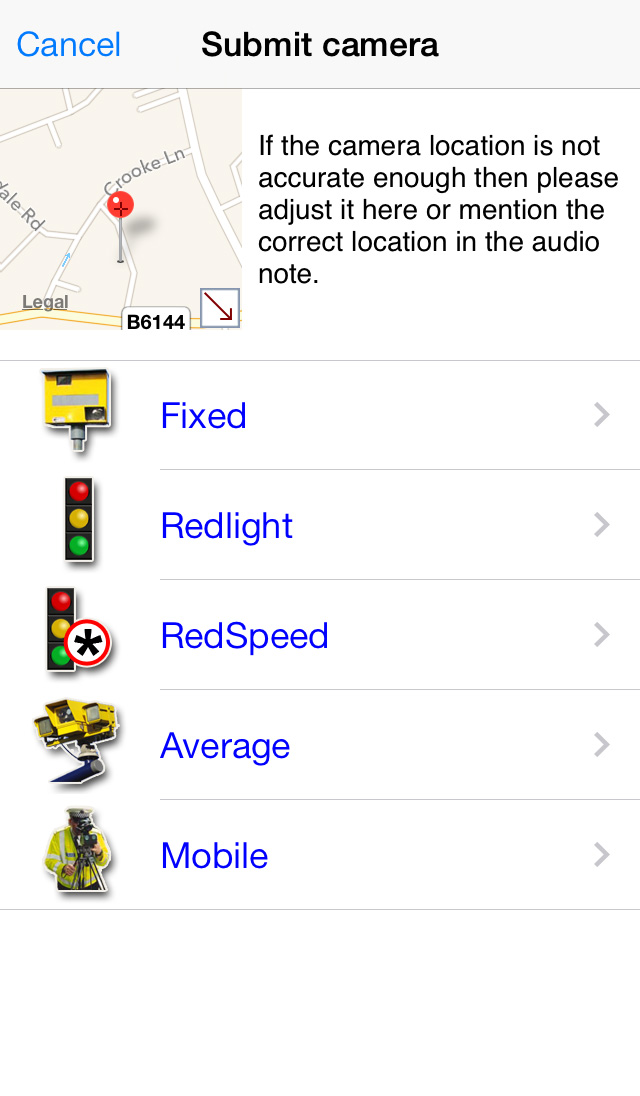
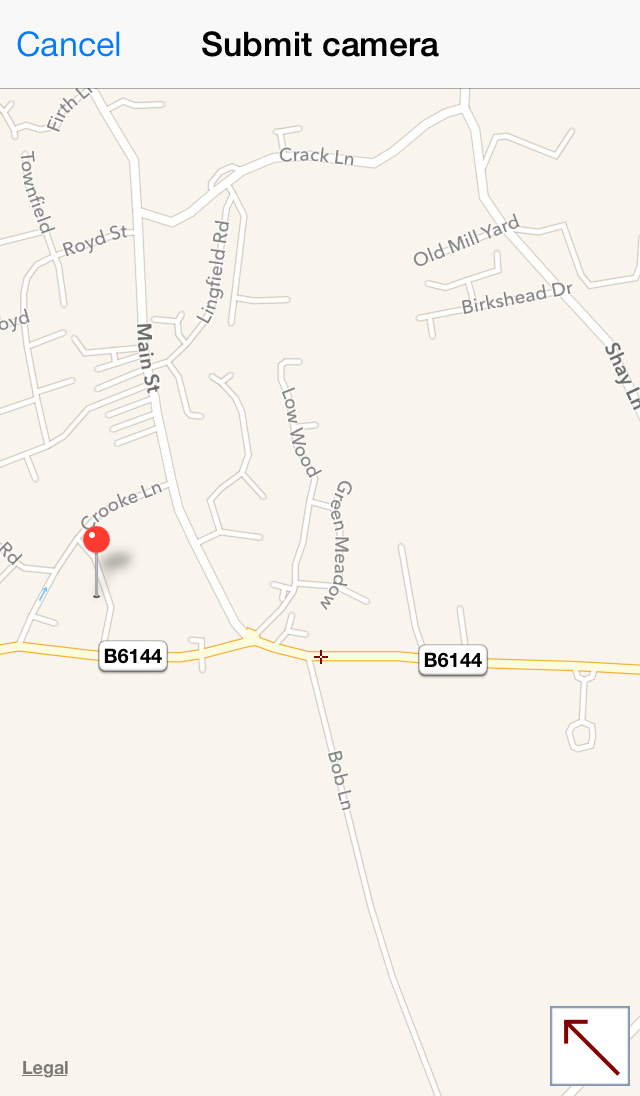
- Tap on the type of camera (see Appendix for details of each type)
- Select the speed
- Select whether it is targeting your current direction, the other direction or both
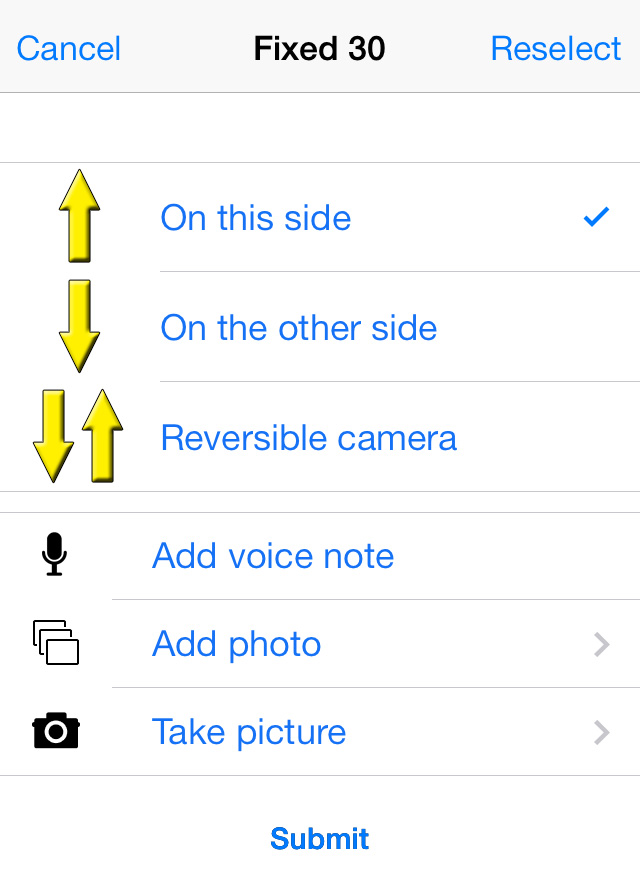
- Add a voice note to add any extra information about the submission
- Add a photo (from your device) or take a picture of the camera/site
- Tap submit
At any of the steps above tap on Reselect to go back one step. The currently selected values will be highlighted.
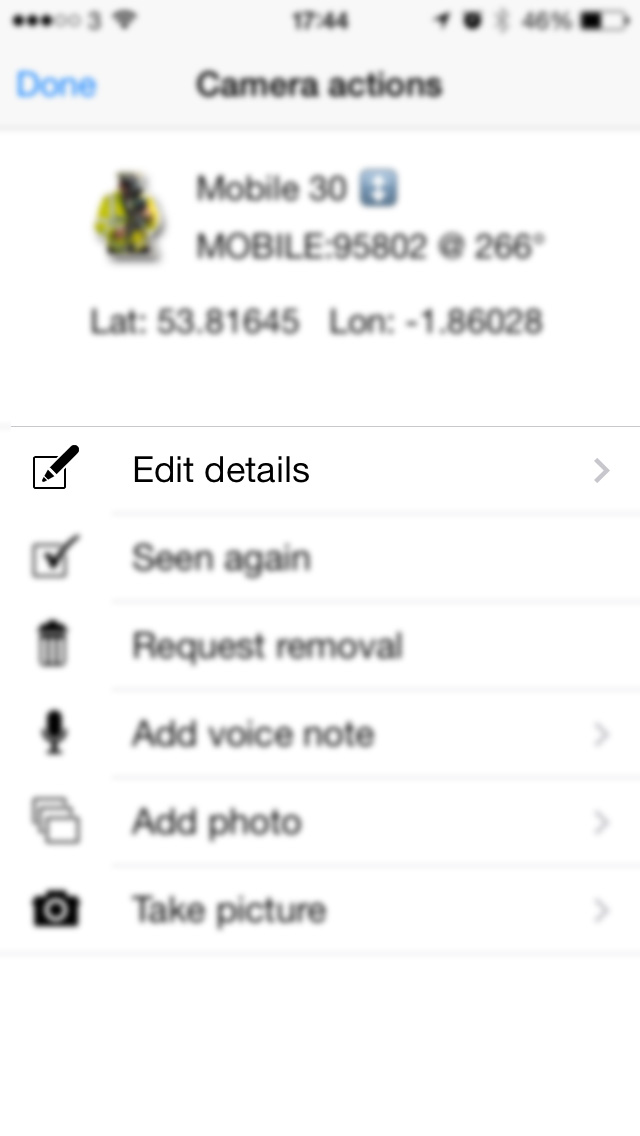
If any existing camera information needs changing (such as a change of speed limit) or a camera needs removing (such as when roadworks have finished) then this can be done from within CamerAlert.
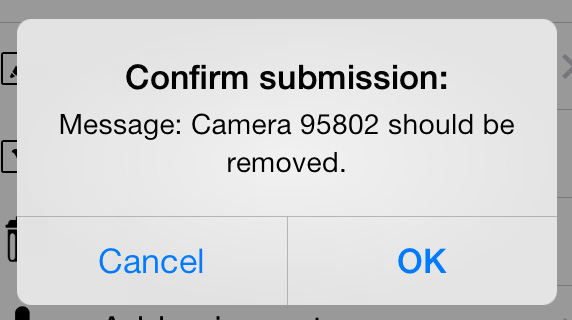
Request a removal:
- Tap the camera’s icon on the map or in the list of nearby cameras
- From the menu that is then shown select ‘Request removal’
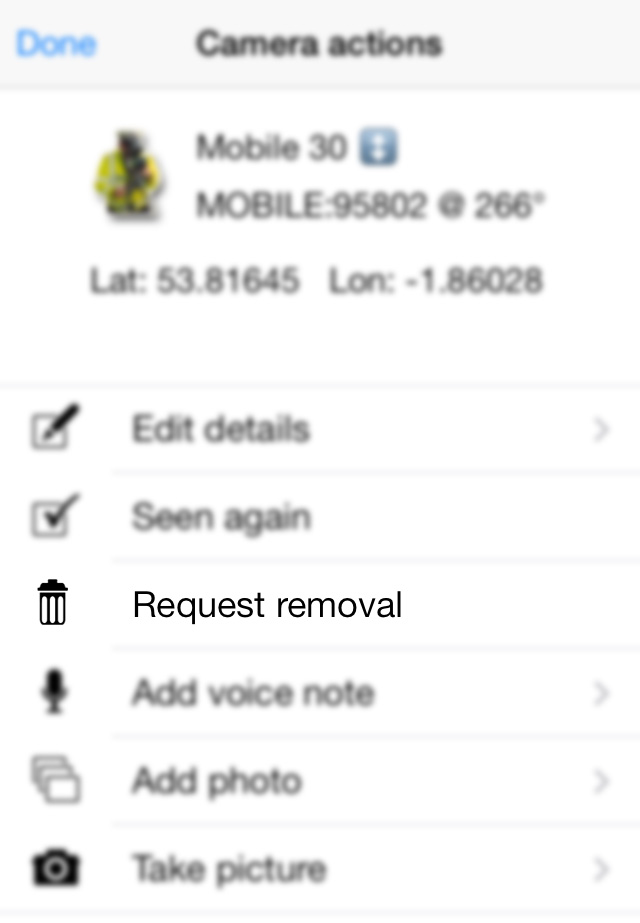
- Tap ‘OK’ to confirm
Submit changes:
- Tap the camera’s icon on the map or in the list of nearby cameras [image]
- From the menu that is then shown select ‘Edit details’
 Note: In the following steps the existing details will be highlighted – if there is no change then please select the highlighted value. The highlight is not shown in these screenshots.At any of the steps above tap on Reselect to go back one step.
 - Check the map to make sure the location is correct (If you need to adjust the location tap on the arrow in the corner of the map thumbnail and reposition the pin, tap the arrow to accept and close.
- Tap on the type of camera (see Appendix for details of each type)
- Select the speed
- Select whether it is targeting your current direction, the other direction or both
- Add a voice note to add any extra information about the submission
- Add a photo (from your device) or take a picture of the camera/site
- Tap submit
8. Troubleshooting Tips
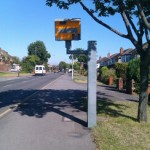
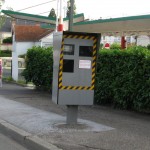
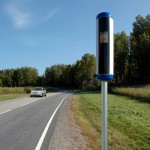
Appendix 1 – Camera Types
| Fixed | ||
|---|---|---|
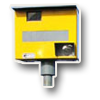 These are static speed cameras, with a permanent installation, that enforce the set speed limit. The cameras are usually activated either by RADAR with lines on the road for photographic evidence or by piezo strips in the road. The master PocketGPSWorld.com database stores information on whether these are front-facing or rear-facing but for the sake of simplicity the CamerAlert app refers to these all as ‘Fixed’. These are static speed cameras, with a permanent installation, that enforce the set speed limit. The cameras are usually activated either by RADAR with lines on the road for photographic evidence or by piezo strips in the road. The master PocketGPSWorld.com database stores information on whether these are front-facing or rear-facing but for the sake of simplicity the CamerAlert app refers to these all as ‘Fixed’. |
||
 |
 |
 |
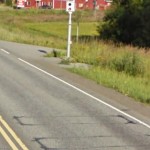
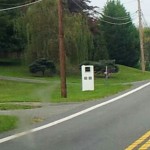
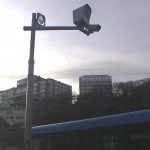
| Rear-facing ‘Gatso’ | Front-facing | Front-facing |
| UK | France | Sweden |
 |
 |
Image coming soon |
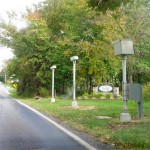
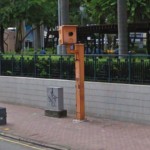
| Front-facing camera with sensor strips | Rear-facing | New front and rear capable camera |
| Finland | Greece | UK |
 |
 |
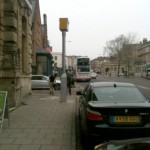 |
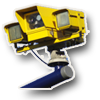
| Rear-facing camera | Rear-facing camera | Digital camera |
| USA | USA | UK |
| Redlight | ||
|---|---|---|
 These cameras are placed at traffic-light controlled junctions and are used to ensure vehicles do not proceed through a red light. Redlight cameras are usually activated by piezo strips in the road just in front of the line at the junction. These cameras are placed at traffic-light controlled junctions and are used to ensure vehicles do not proceed through a red light. Redlight cameras are usually activated by piezo strips in the road just in front of the line at the junction. |
||
| Image coming soon! | 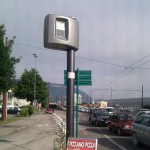 |
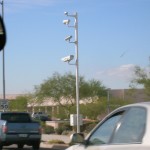 |
| UK | France | USA (Arizona) |
 |
 |
 |
| Canada | Turkey | Hong Kong |
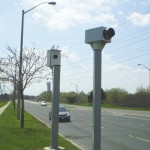
| RedSpeed | ||
|---|---|---|
 Also referred to as ‘redlight with speed’ or ‘speed on green’ cameras. Also referred to as ‘redlight with speed’ or ‘speed on green’ cameras.RedSpeed cameras have a double function – they work as both fixed speed cameras (when the lights are on green) as well as redlight cameras (when the lights are on red). RedSpeed cameras usually have both piezo strips (for the redlight action) as well as marker lines at the junction (for the speed action). |
||
| Images coming soon! | Images coming soon! | Images coming soon! |
| ?? | ?? | ?? |
| Average | ||
|---|---|---|
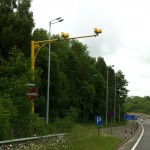
 Also referred to as ‘section cameras’. Also referred to as ‘section cameras’.Average speed cameras monitor vehicle speed across a length of road and aim to stop people slowing down for a camera and speeding up again. They are commonly found through roadworks and are used to enforce the (usually lowered) speed limit for the whole stretch. CamerAlert includes extra information about average speed cameras to say whether they are a start, middle or end camera. |
||
 |
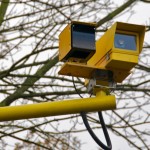 |
Image coming soon! |
| UK | UK | ?? |
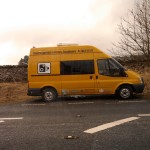
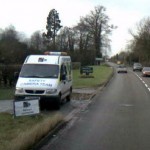
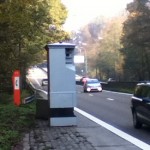
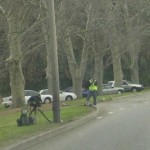
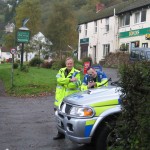
| Mobile | ||
|---|---|---|
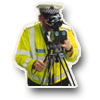 For CamerAlert, mobile cameras are any non-installed speed camera such as a police officer with a handheld speed gun or a speed camera van. We do not include sites where community groups monitor speed as they are not enforceable. For CamerAlert, mobile cameras are any non-installed speed camera such as a police officer with a handheld speed gun or a speed camera van. We do not include sites where community groups monitor speed as they are not enforceable. |
||
 |
 |
 |
| Camera van | Camera van | Mobile camera |
| UK | UK | Belgium |
 |
 |
This space for rent |
| Mobile unit | Police handheld | |
| Australia | UK | |